
Fraud prevention with Google reCAPTCHA for MediaStore Components
Protect your MediaStore Components integration from fraudulent activities with Google reCAPTCHA, an advanced security solution that enhances authentication while maintaining a seamless user experience. Read more about Google reCAPTCHA.
Integration Guide
Follow the steps below to integrate Google reCAPTCHA with your Cleeng integration:
- Configure Google reCaptcha in Google [optional].
- Integrate your application with Google reCAPTCHA.
- Configure Google reCAPTCHA in Cleeng Dashboard.
1) Configure Google reCAPTCHA in Google [optional]
You can use the the default Google reCAPTCHA account which is configured and managed by Cleeng. If you do so, skip this step and jump to step 2.
If you prefer to use your own Google reCAPTCHA follow the Google reCAPTCHA integrations guide and generate the site key and secret key:
-
Create Google Account and go to the Google reCAPTCHA admin page.
-
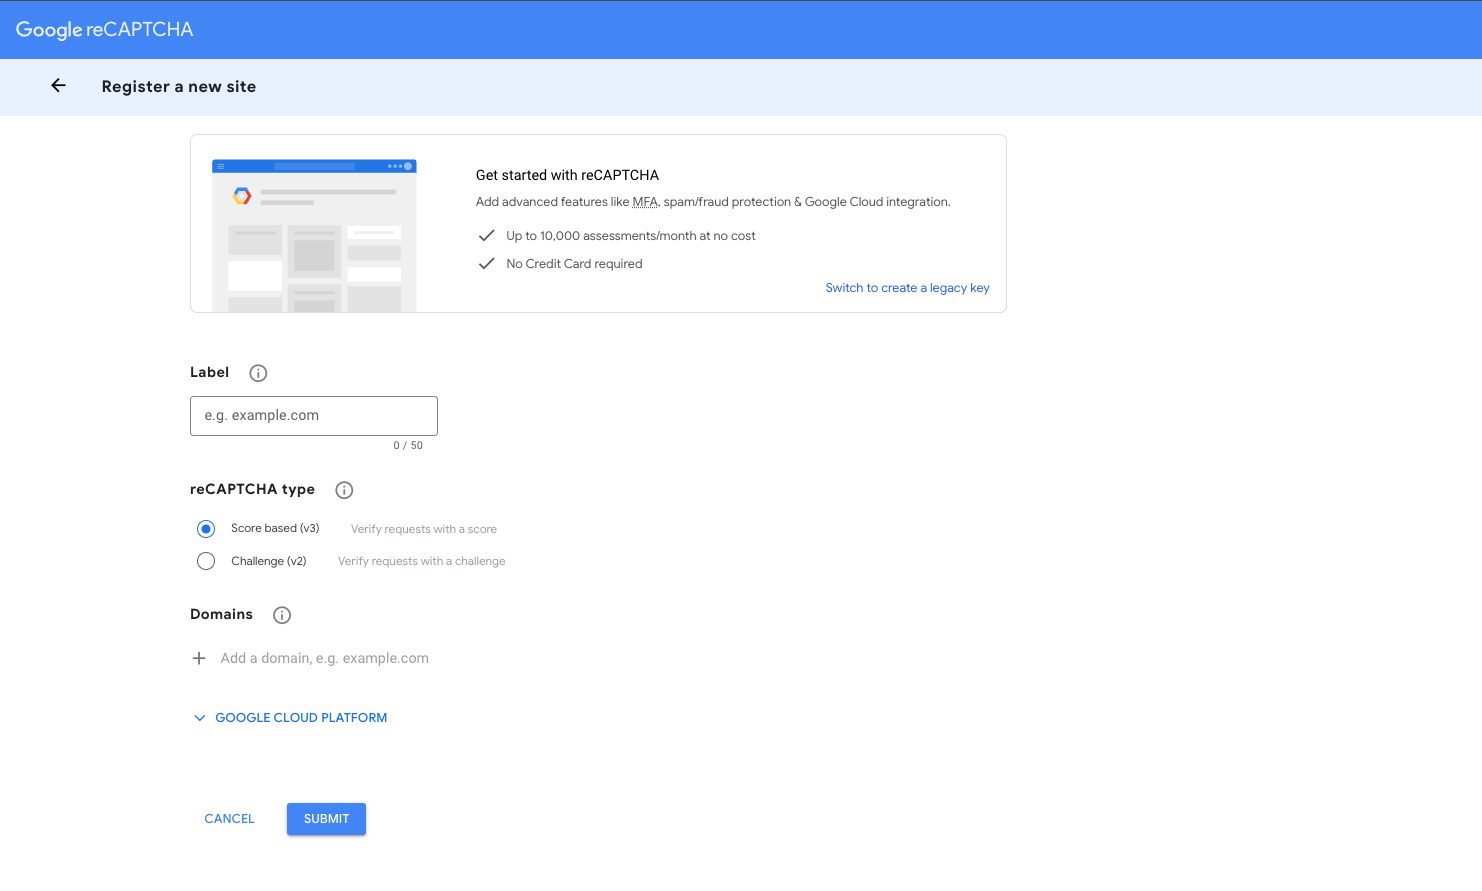
Register a new page on https://www.google.com/recaptcha/admin/create.
-
Add a label (name of your service, site).
-
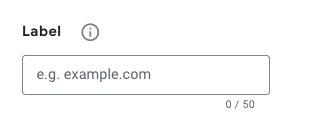
Select challenge reCAPTCHA type:
-
Choose Score based Google reCAPTCHA to verify users based on their score. If a user's score falls below the threshold, they will be considered invalid, and the request will be blocked. The default threshold is 0.5. To change this value, please contact our support team.
-
Choose Invisible reCAPTCHA badge if you want to make a minimal effort on the customer (challenge will be called only if needed - captcha will suspect that the user is suspicious)
-
Choose “I’m not robot“ Checkbox if you want to show checkbox to the user every time captcha is needed.
-
-
Add your domain.

-
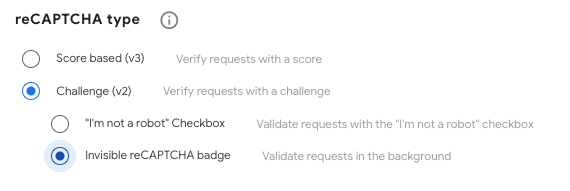
You can now copy your keys (site key, secret key).
2) Integrate your application with Google reCAPTCHA
Implement the Google reCAPTCHA on your client application (use the site key to generate reCAPTCHA value).
- Make sure that you are using a mediastore-sdk packageversion 5.7.0 or higher.
- Configure the Google reCAPTCHA with the
Config.setGoogleRecaptcha()method.Where:Config.setGoogleRecaptcha({ showCaptchaOnRegister: true | false, showCaptchaOnPurchase: true | false, sitekey: SITEKEY_VALUE });
showCaptchaOnRegister: pass true if you want to add the Google reCAPTCHA verification during the Registration
showCaptchaOnPurchase: pass true if you want to add the Google reCAPTCHA verification during the Purchase
sitekey- pass a Google sitekey that you generated in the previous step if you want to use your own Google reCAPTCHA account
3) Configure Google reCAPTCHA in Cleeng Dashboard
Add Google reCAPTCHA secret key as the secret and select when you want to validate your captchaValue.
-
Go to the Cleeng Dashboard -> Admin & Tools -> Integration Hub page and select Google reCAPTCHA.
-
After selecting Google reCAPTCHA, click the Connect button to display the configuration screen.
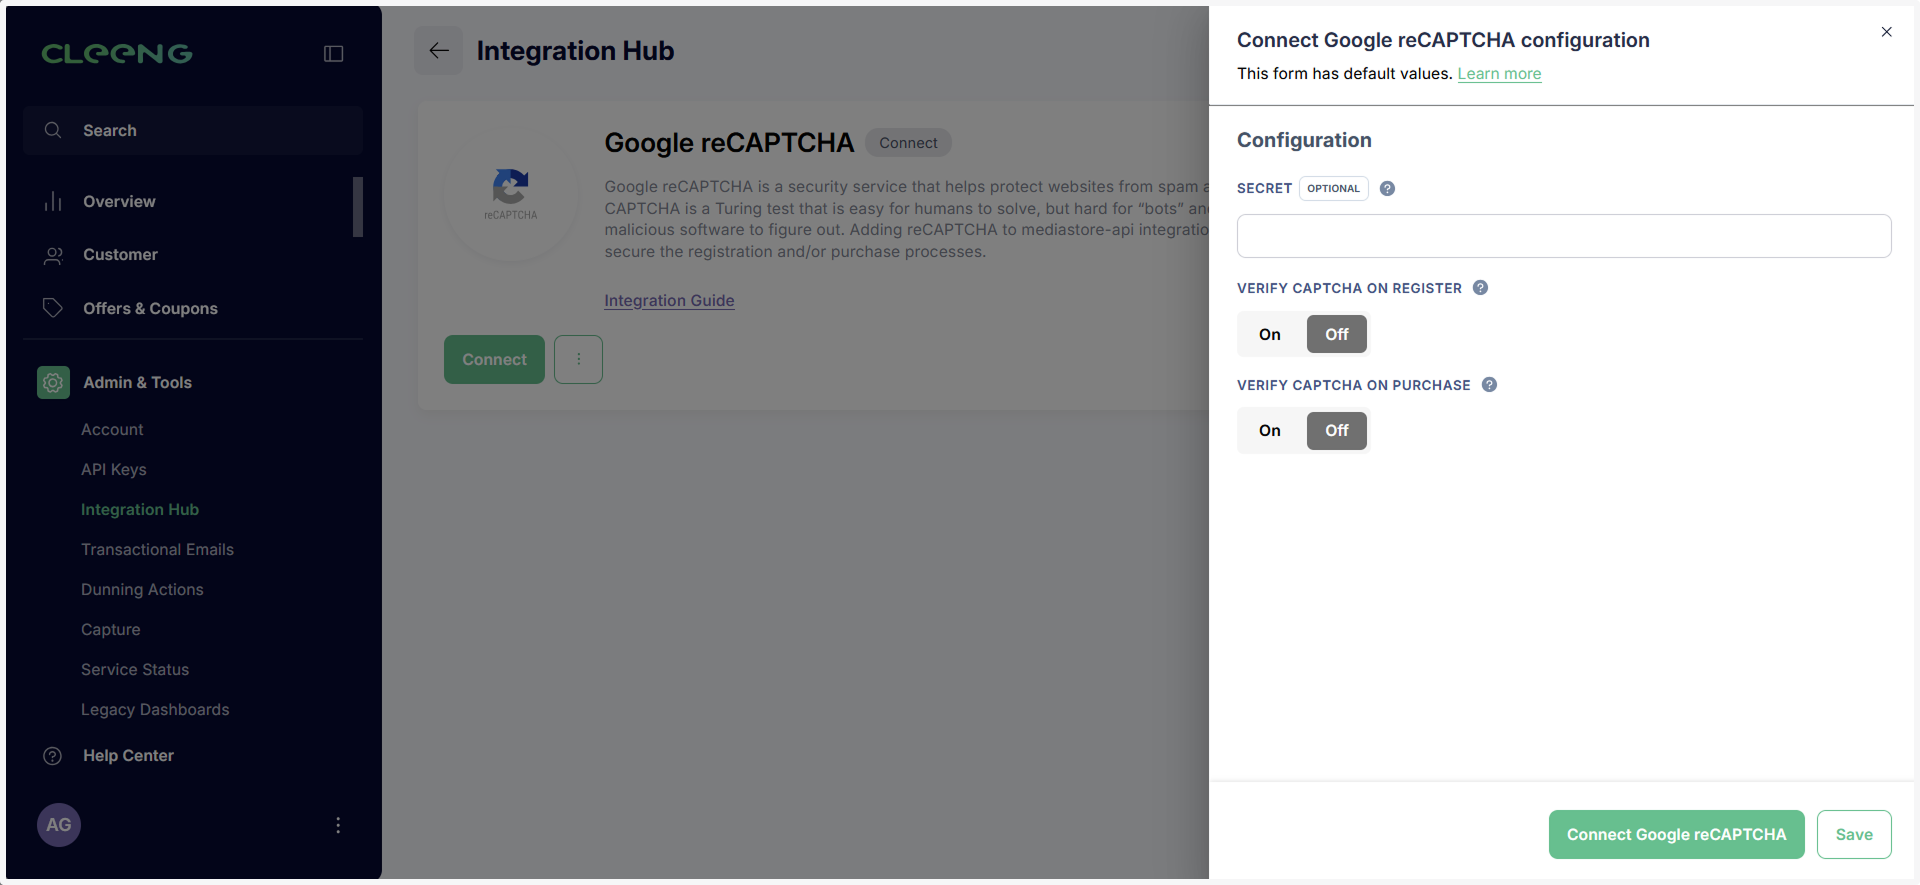
-
Paste the Google reCAPTCHA secret key in the Secret field.
-
If you’re using the default Google reCAPTCHA account (see step 1) leave the ‘Secret’ field empty.
-
If you’re using your own Google reCAPTCHA (see step 1), paste the Google reCAPTCHA secret key in the Secret field.

-
-
Decide which step in the user journey you want to secure (registration and/or purchase) and turn the respective buttons to On.
 Note
NoteYour configuration in the dashboard must be consistent with the configuration on the client side.
Default values may be updated by the external system. If you want a value to remain unchanged, manually enter the value instead of relying on the default.
If you change a default value and want to go back to the original, you can easily do so by selecting the Revert to default button.
-
Click the Save button to save the settings.

-
Connect the Google reCAPTCHA integration when you are ready by clicking the Connect Google reCAPTCHA button.

Updated 11 months ago